On the road to 3D
where I take my first steps in 3D, and utterly fail in creating something realistic.
this post was copied from my old site in 2017 - it's a bit dated, but it's fun for me to keep around as it shows my first steps in what I now know I like a lot
So, I've started to teach myself 3D modelling.
Why? In my mind the worlds and realities I shape during a shoot are far more complex than the pictures I end up with at the end. They're not there yet, and I want to be able to do more. To add surreal realities to photos. To add fake elements to existing photos. To build more. To fully replicate what I see in my mind, and show it to the world in the form of a picture.
Here I'll try to show my first steps in this field. Mostly for myself so I can laugh about it later. But also to show that first steps are both painful and amazing at the same time, and hopefully to inspire others to do the same.
I've started to teach myself Blender. Blender is an amazing open source 3D modelling and rendering tool. There's somewhat of a steep learning curve involved as with any complex bit of software, but from what I've discovered so far: it really pays of to learn! Also, it's free, and that can't be said for many of it's competitors who price themselves out of my league for experimenting and learning 3D rendering.
For my purpose Blender absolutely can do way too much! I don't need animations, video, inverse kinematics or motion tracking at the moment. I just need to be able to make semi realistic alternative realities. Preferably in such a way that I can combine parts of real photos with parts of fake 3D generated scenery. Nothing much, right? Let's go through the steps of discovery in the form of a project.
Step 1: let's build ourselves a world!
For my first project I wanted to start small. Something simple. Something doable. But first, I needed to learn Blender.
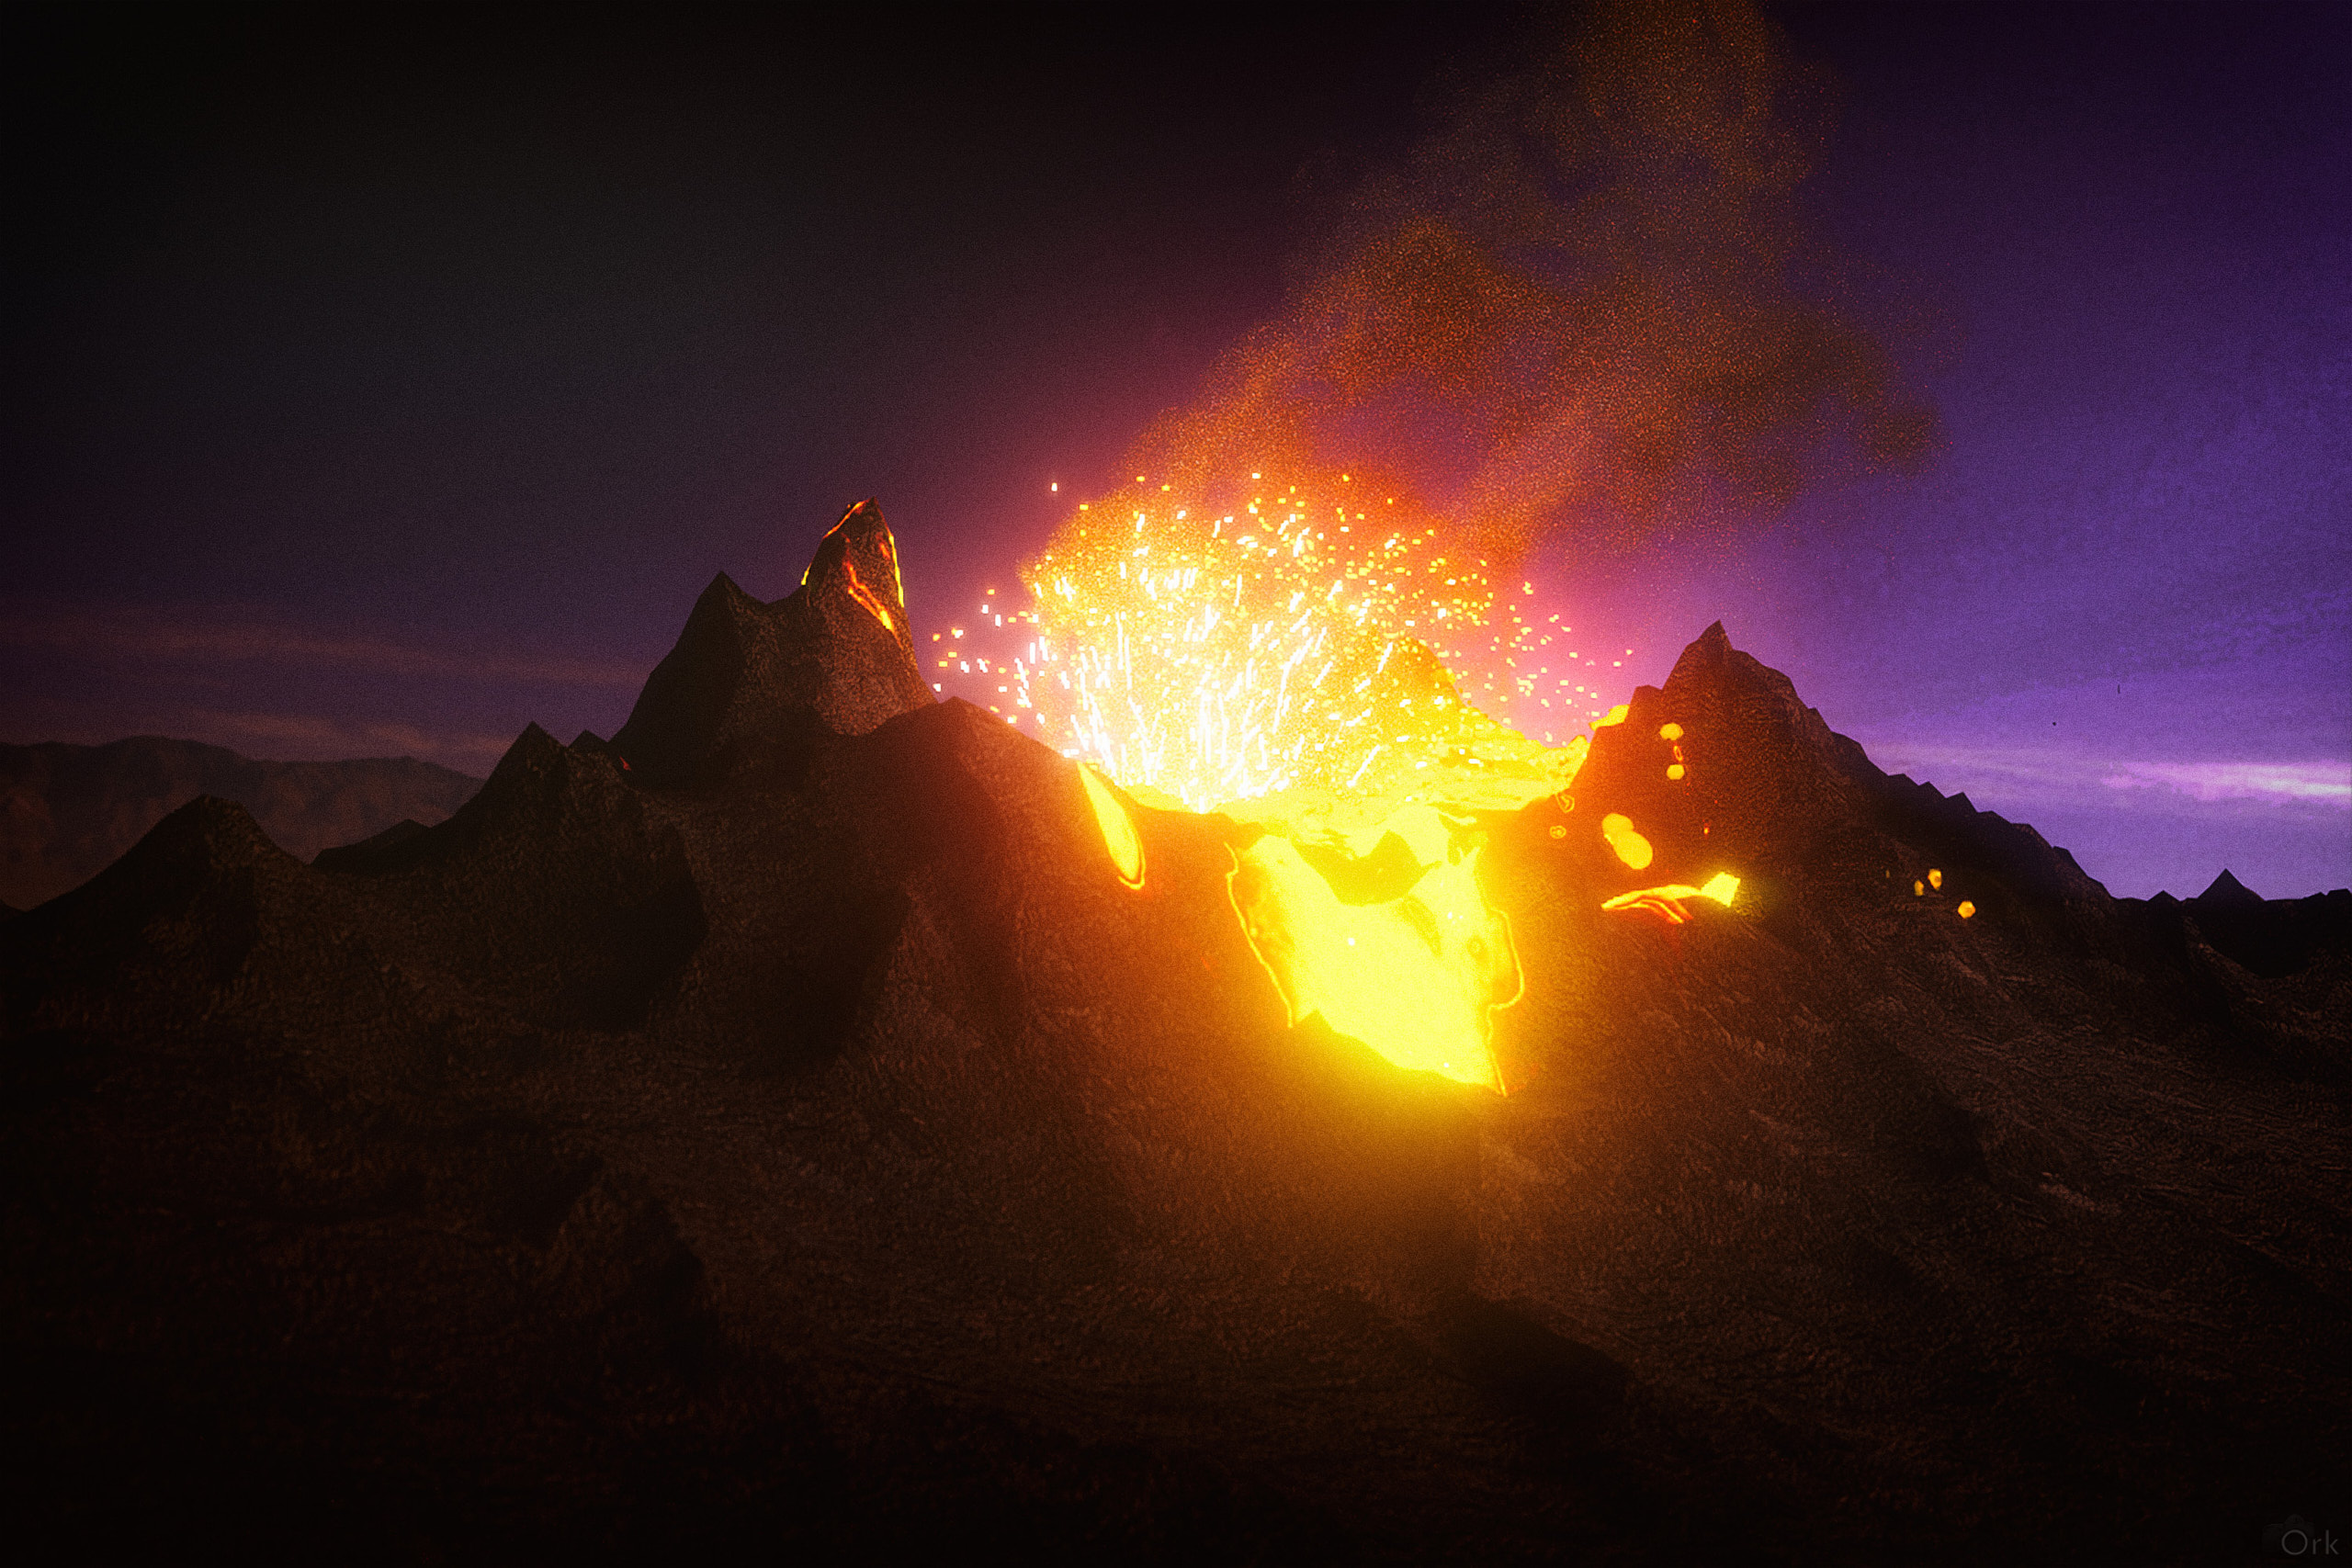
I already had a picture in my mind of a scene I wanted to build:
a human-scorpion hybrid in a field of lava.
No pressure.
So I started watching any and all tutorials I could find that would help me. And then I learned soo many cool things! Did you know Blender has all these nifty things that are more-than-amazing to use for such projects? I went from tutorial video to tutorial video, experimenting as I went, trying all the tricks.
And what do you do when you find many many new toys?
Obviously, you use EVERYTHING! ALL AT ONCE! Fluid dynamics for the Lava. Atmospherics. Complex textured materials. Did you know lava is like honey? I know now. Did you know it's quite important to keep that place where you want your model to be actually higher than the rest of the scenery otherwise she'll just be washed away by an incoming computer generated lavaflow? I know now...
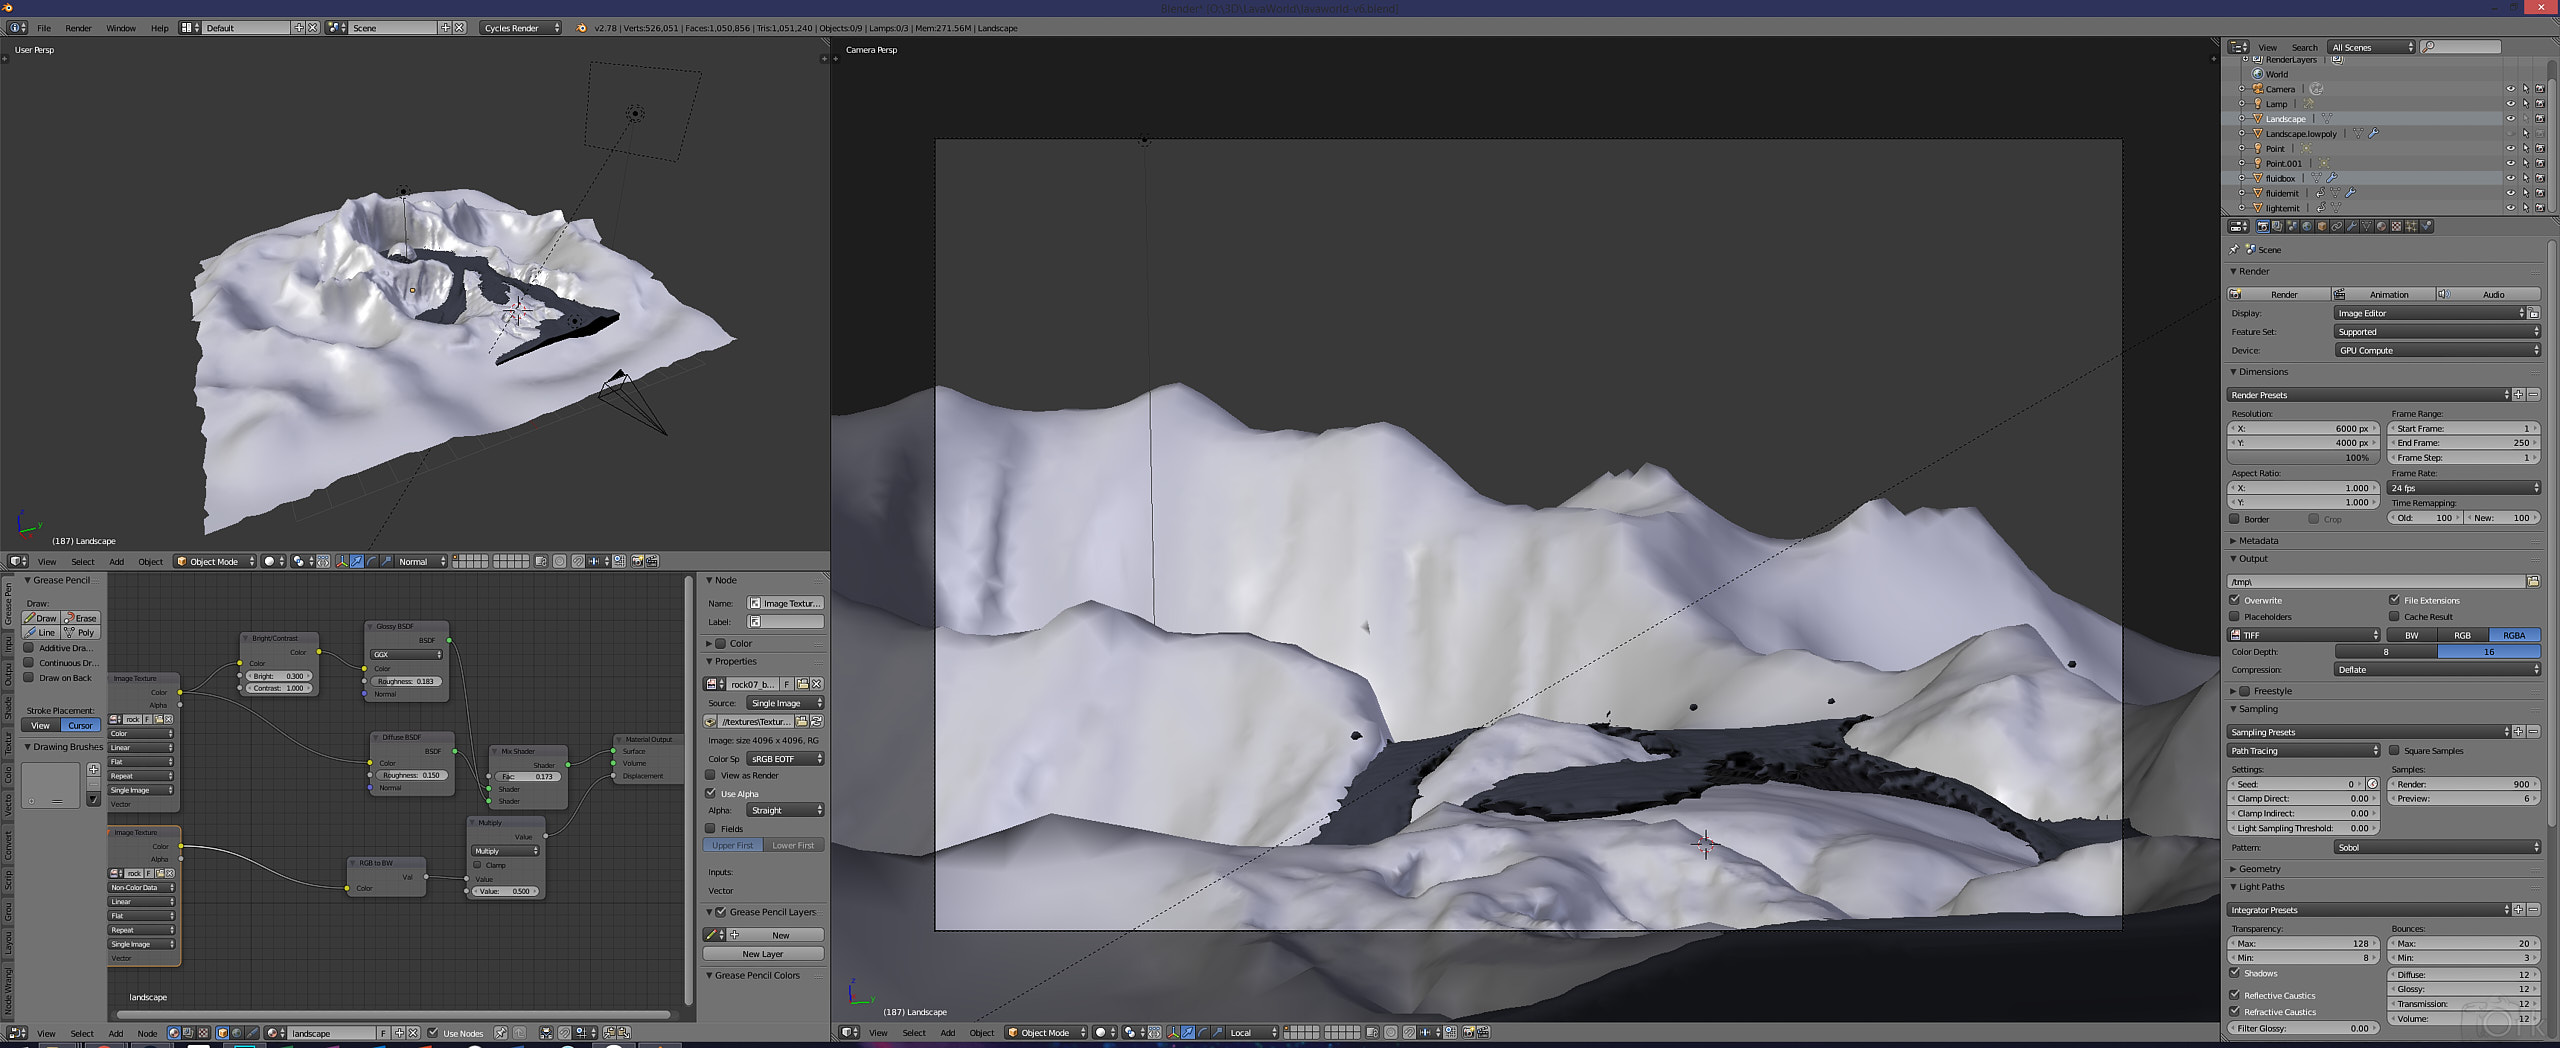
Here's blender in action: top left shows the world I created, right shows the scene from the camera I've added. The dark grey stuff is lava.. and it's about to wash away the field where I really want to put my model.. oh dear.
A large part of the above was based on an amazing Volcano tutorial by CG Geek. Check it out here!
In hindsight this is where I should've stopped. This project had at this point already moved from "something simple" to "overly ambitious". Whoops.. but there's so much cool stuff to learn! Let's do this anyway! I think I went through 14 iterations before I was somewhat satisfied with what I required for my world. Here are a few results:
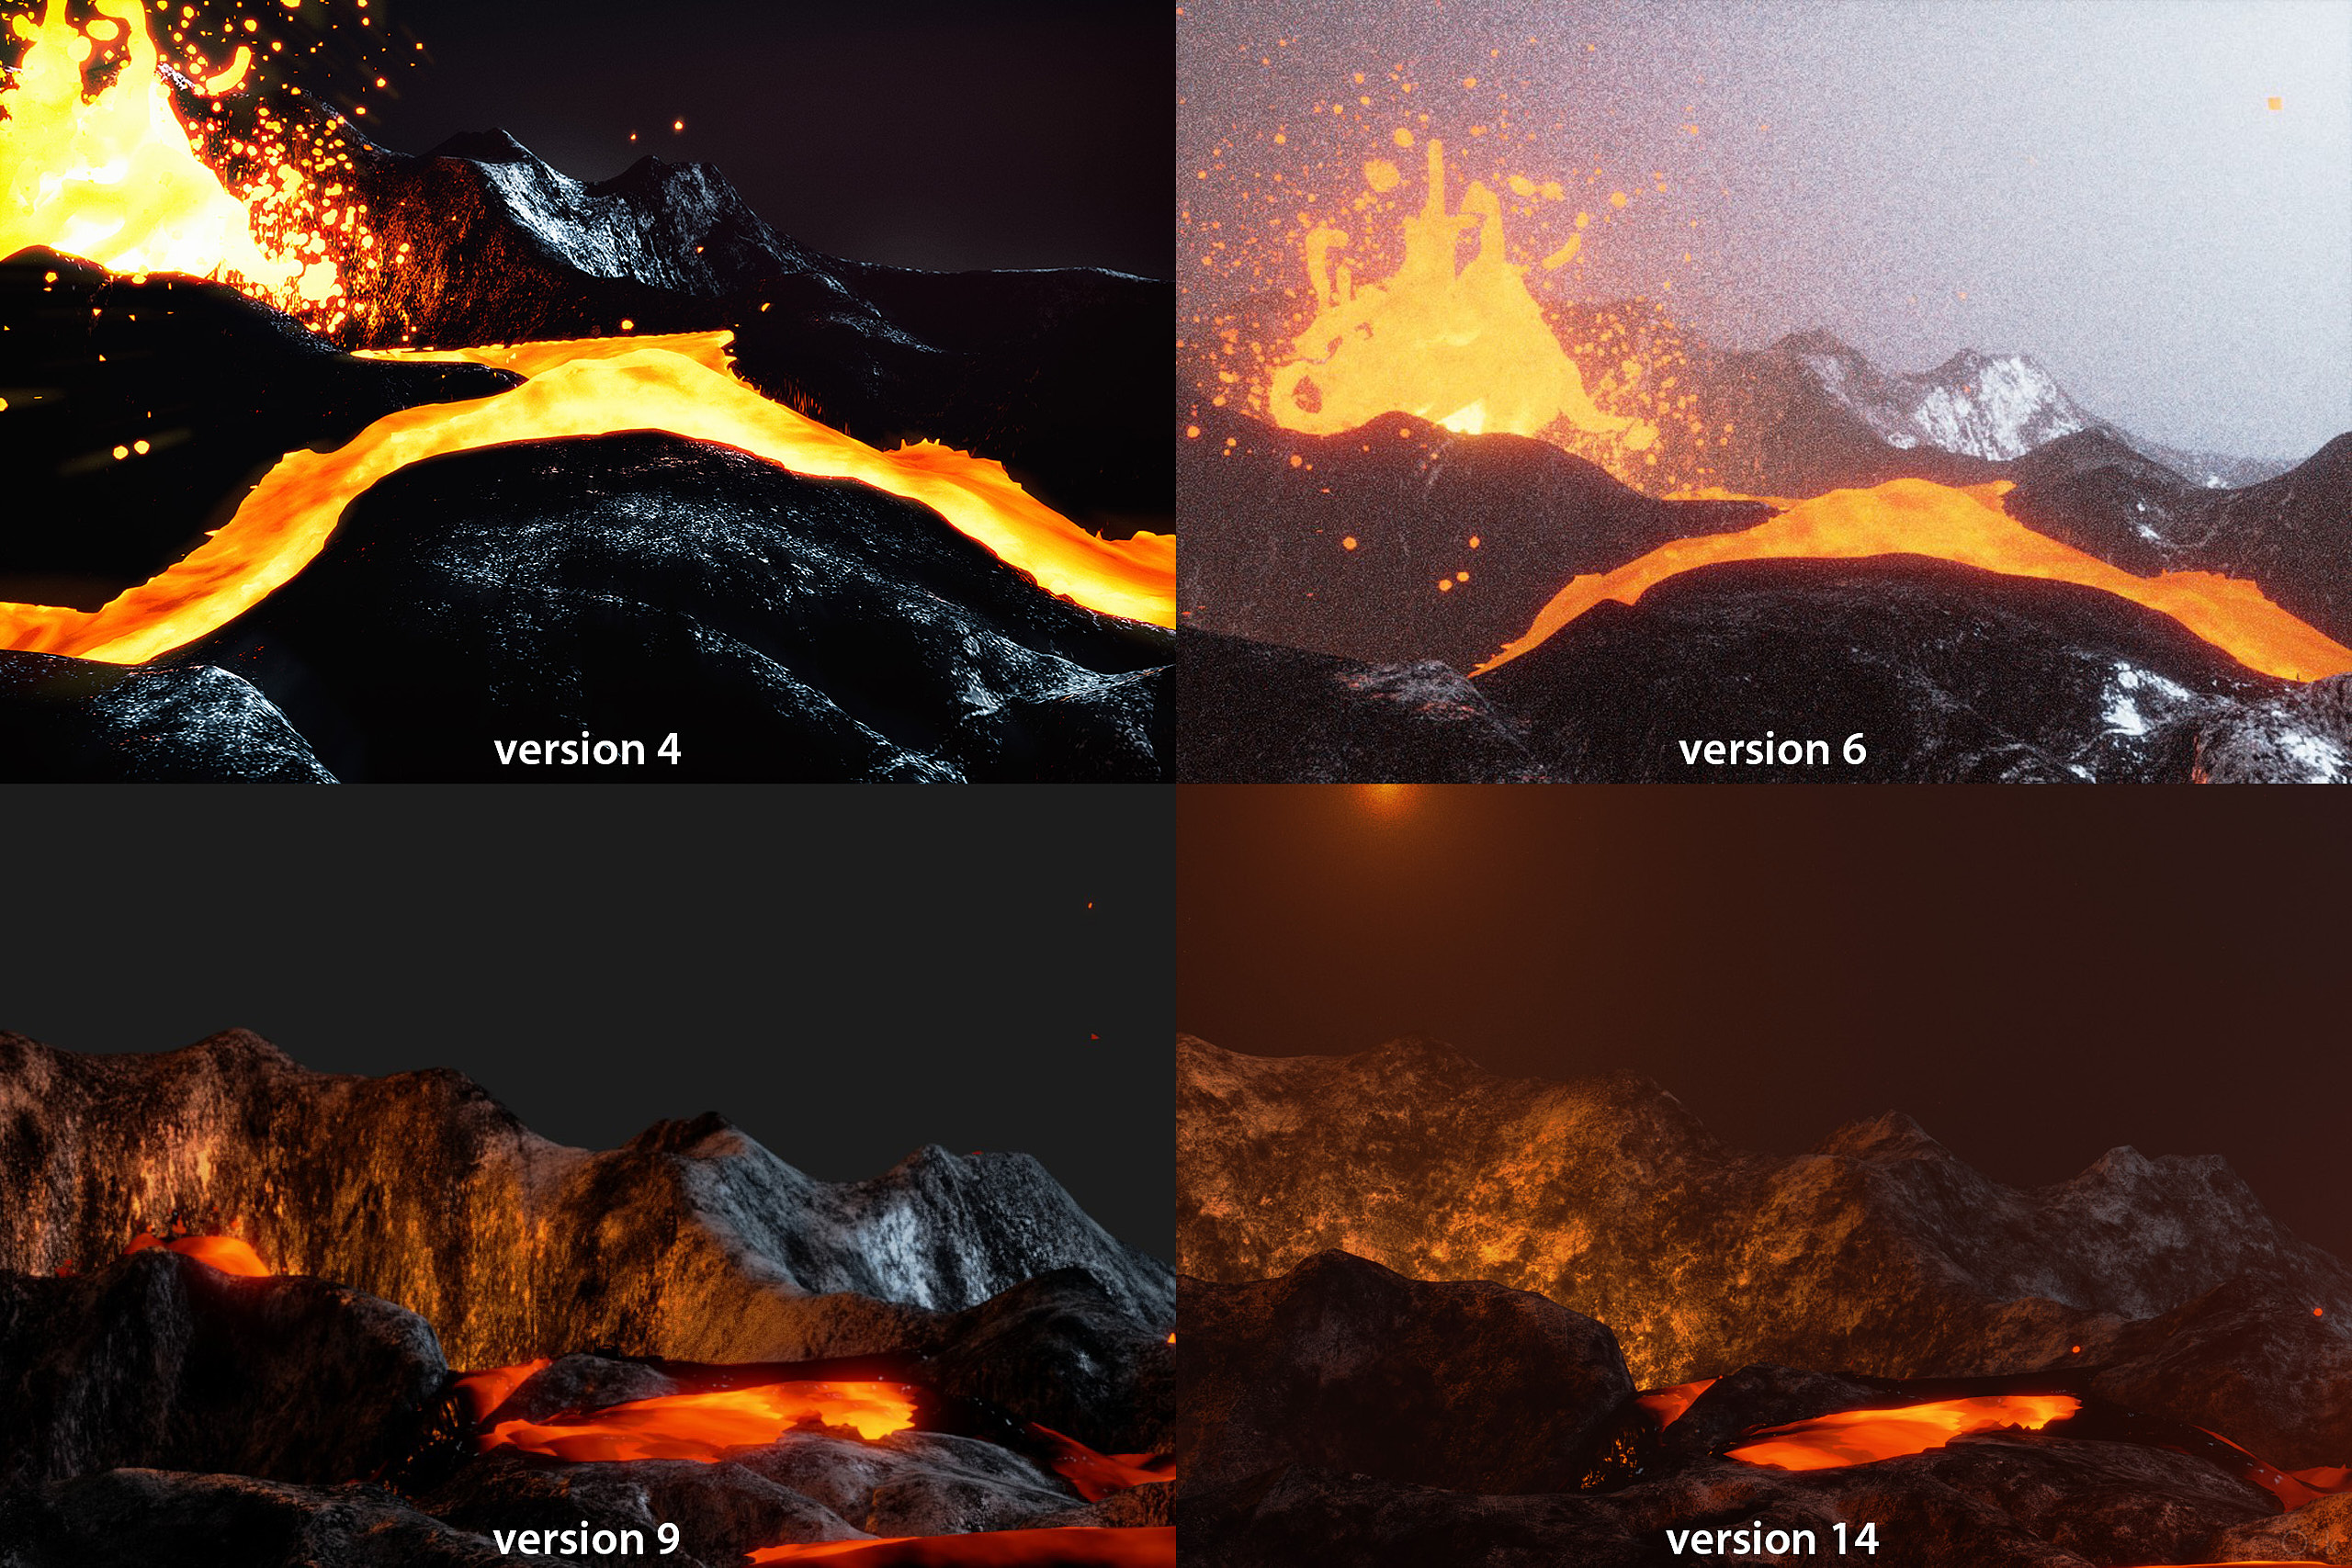
- Iteration 4: Ooh nice lava! But I can't see the world...
- Iteration 6: yay atmospherics! Uh oh, everything became too bright!...
- Iteration 9: much better camera angle.. but now.. ouch the texture looks hideous!...
- Iteration 14: maybe this will work?
Maybe it will. Let's go to step 2!
Step 2: Let's light the model!
Okay, back to the studio! With the above scenery in my head I started placing lamps in the studio to match the light. There needed to be nice warm light from the middle left, since that's where the lava explosion would be, and there needs to be a lot of warm reddish light from underneath everywhere.. more lava! And I wanted some blueish light from top right, moonshine or something similar, just to contrast it a bit!
Thanks to the amazing Silas Sylvina - who - incidentally - was also the person that pushed me into the scorpion hybrid idea in the first place, and with help of Ilse who bodypainted an awesome work of art we managed to get this done in a fun afternoon of doing complex posing on a plastic crate. The photos of this step I'll just leave to your imagination. Let's just go to step 3!
Step 3: The scorpion hybrid.
Back to blender to create a tail for our freshly photographed model! I set up a new scene, and rebuilt the light setup I had in my studio as fake 3D light emitters in the virtual environment. This would help with ensuring that the tail would be similarly lit to the model. But about that tail.. how would I create one? I don't have the skills for that?
Browsing online I found several stashes of CC-0 or otherwise free-to-use licensed 3D models. Nice! I took one of them, and then discovered an immediate problem with free. All the polygons did not do what I wanted! All those faces and vertices were oddly duplicated or unlinked.. ugh! It was a mess.. and I really didn't have the skills to deal with that yet.
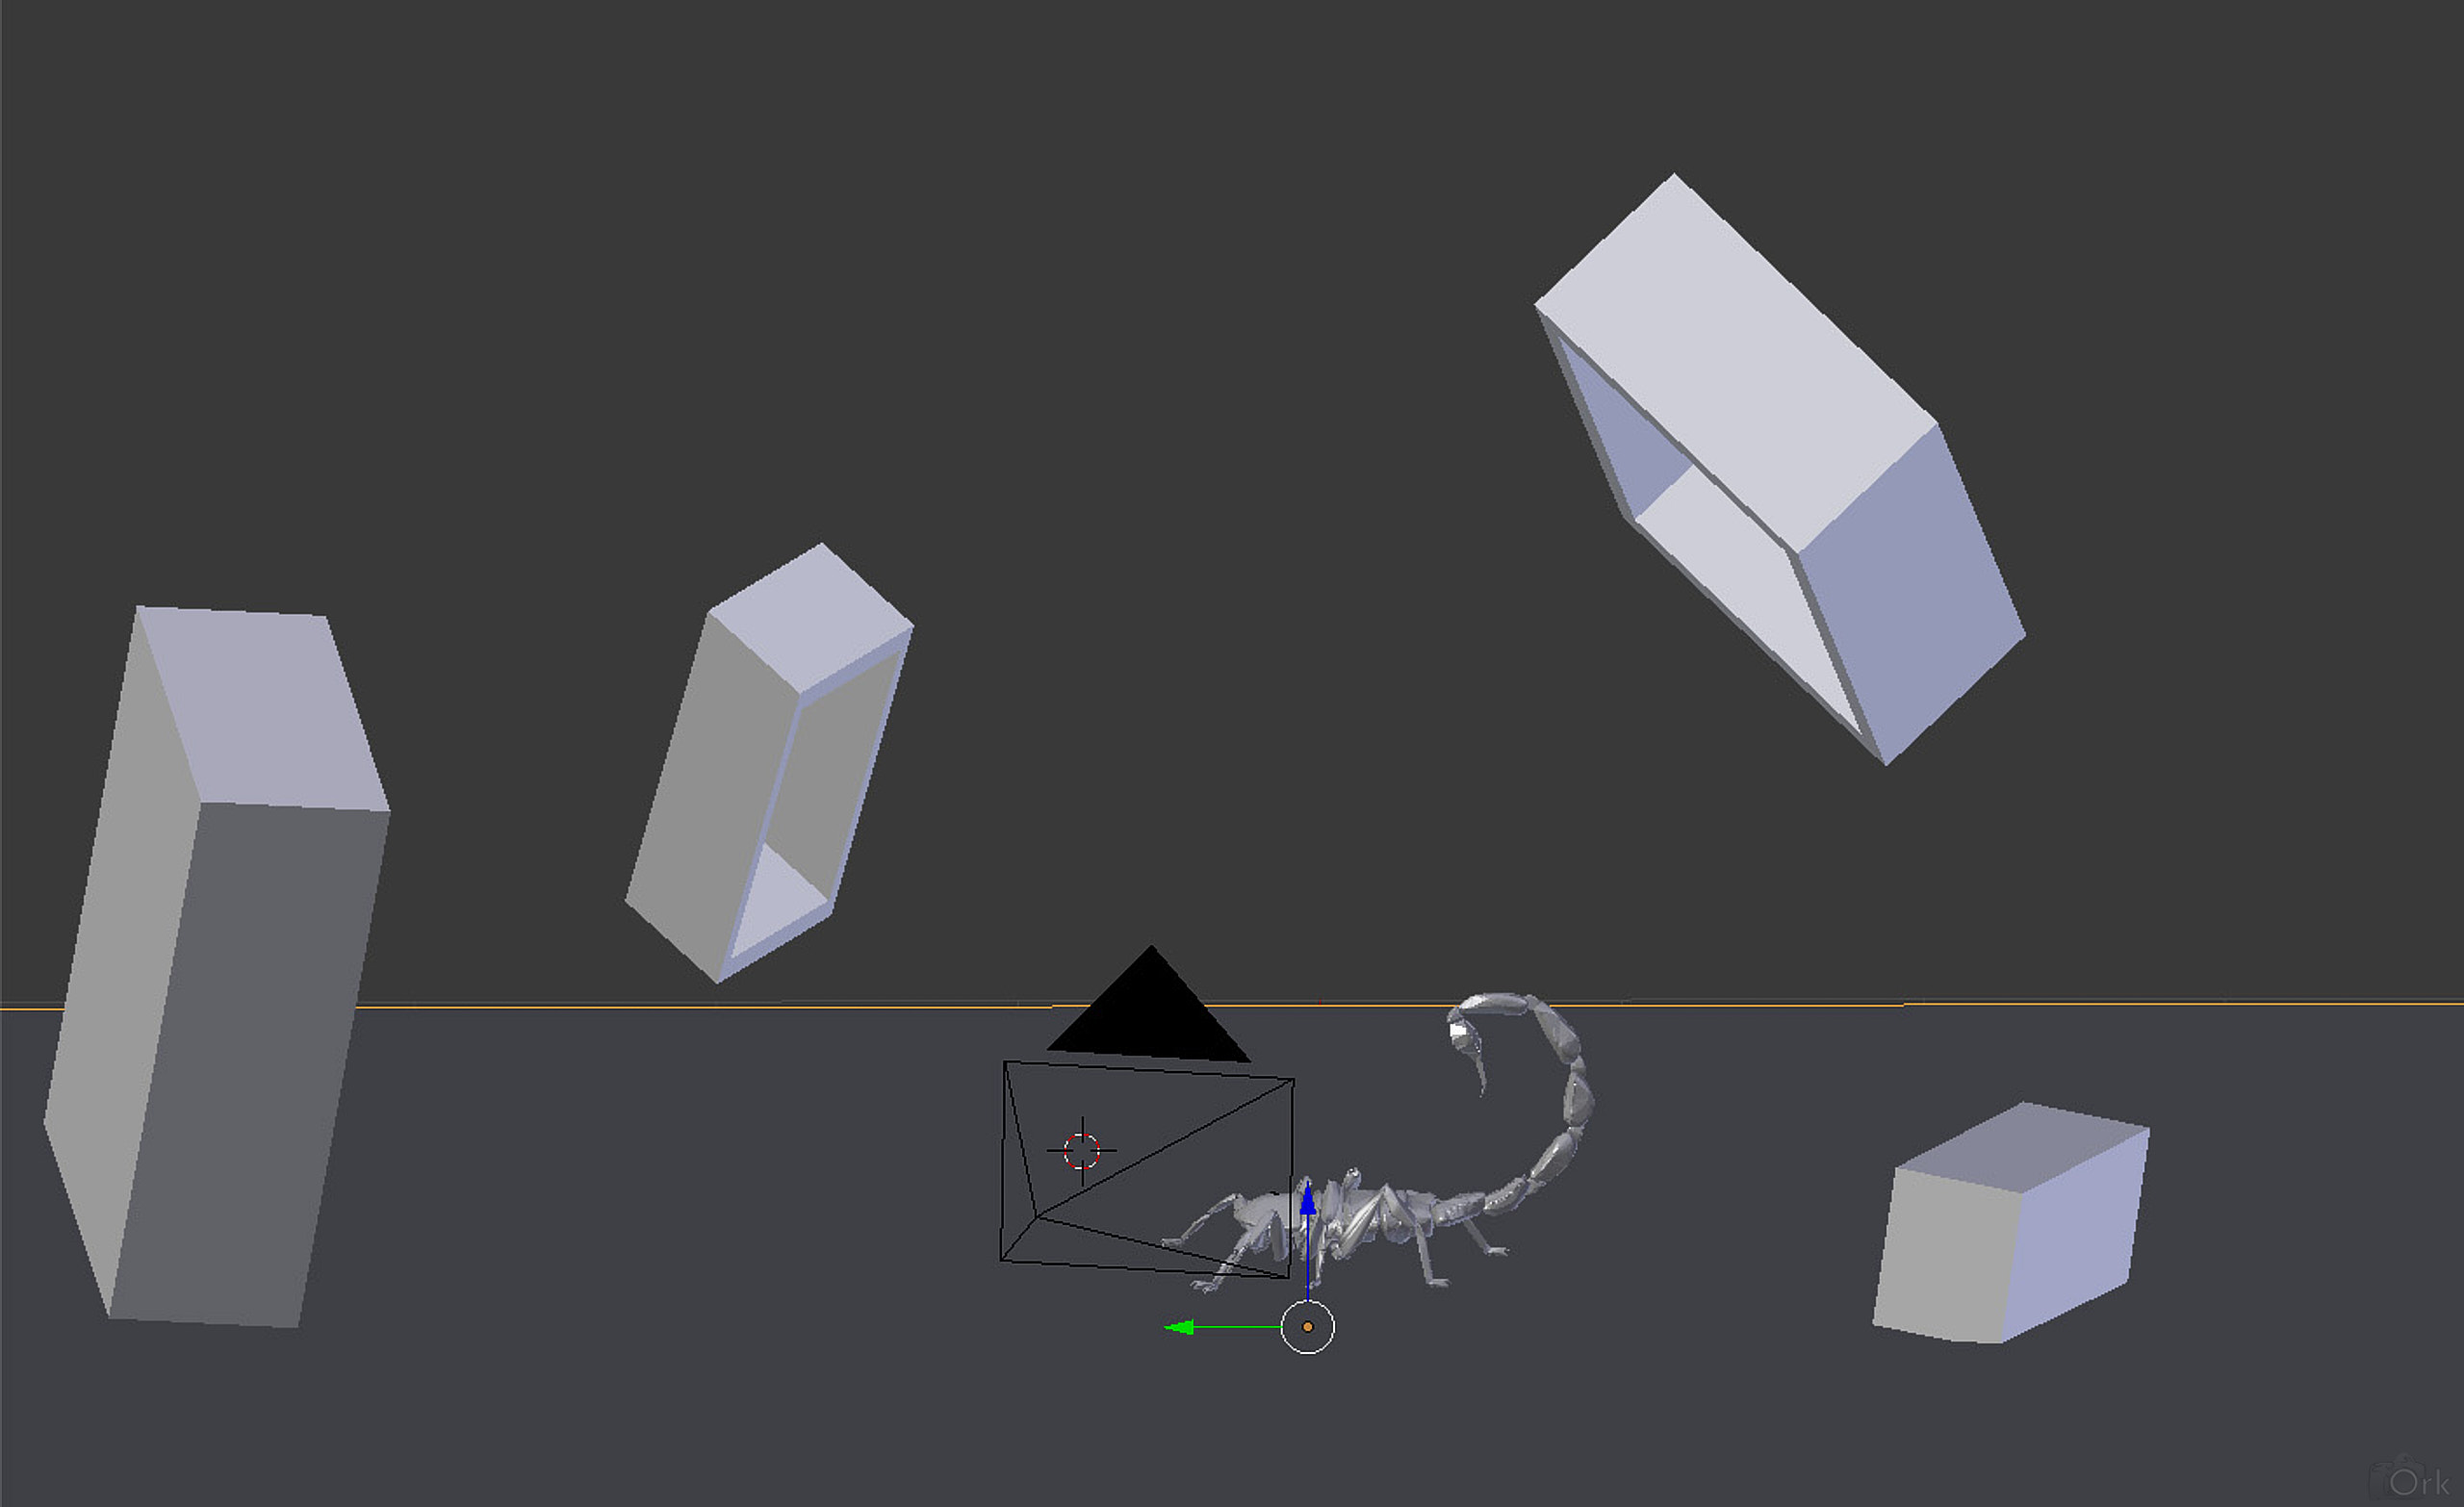
I tried anyway, and started deleting the head. Didn't need it. Would be replaced by real model. I then went on to texture the scorpion body with a piece of skin taken from the model (don't ask). And then I started to merge the combination:
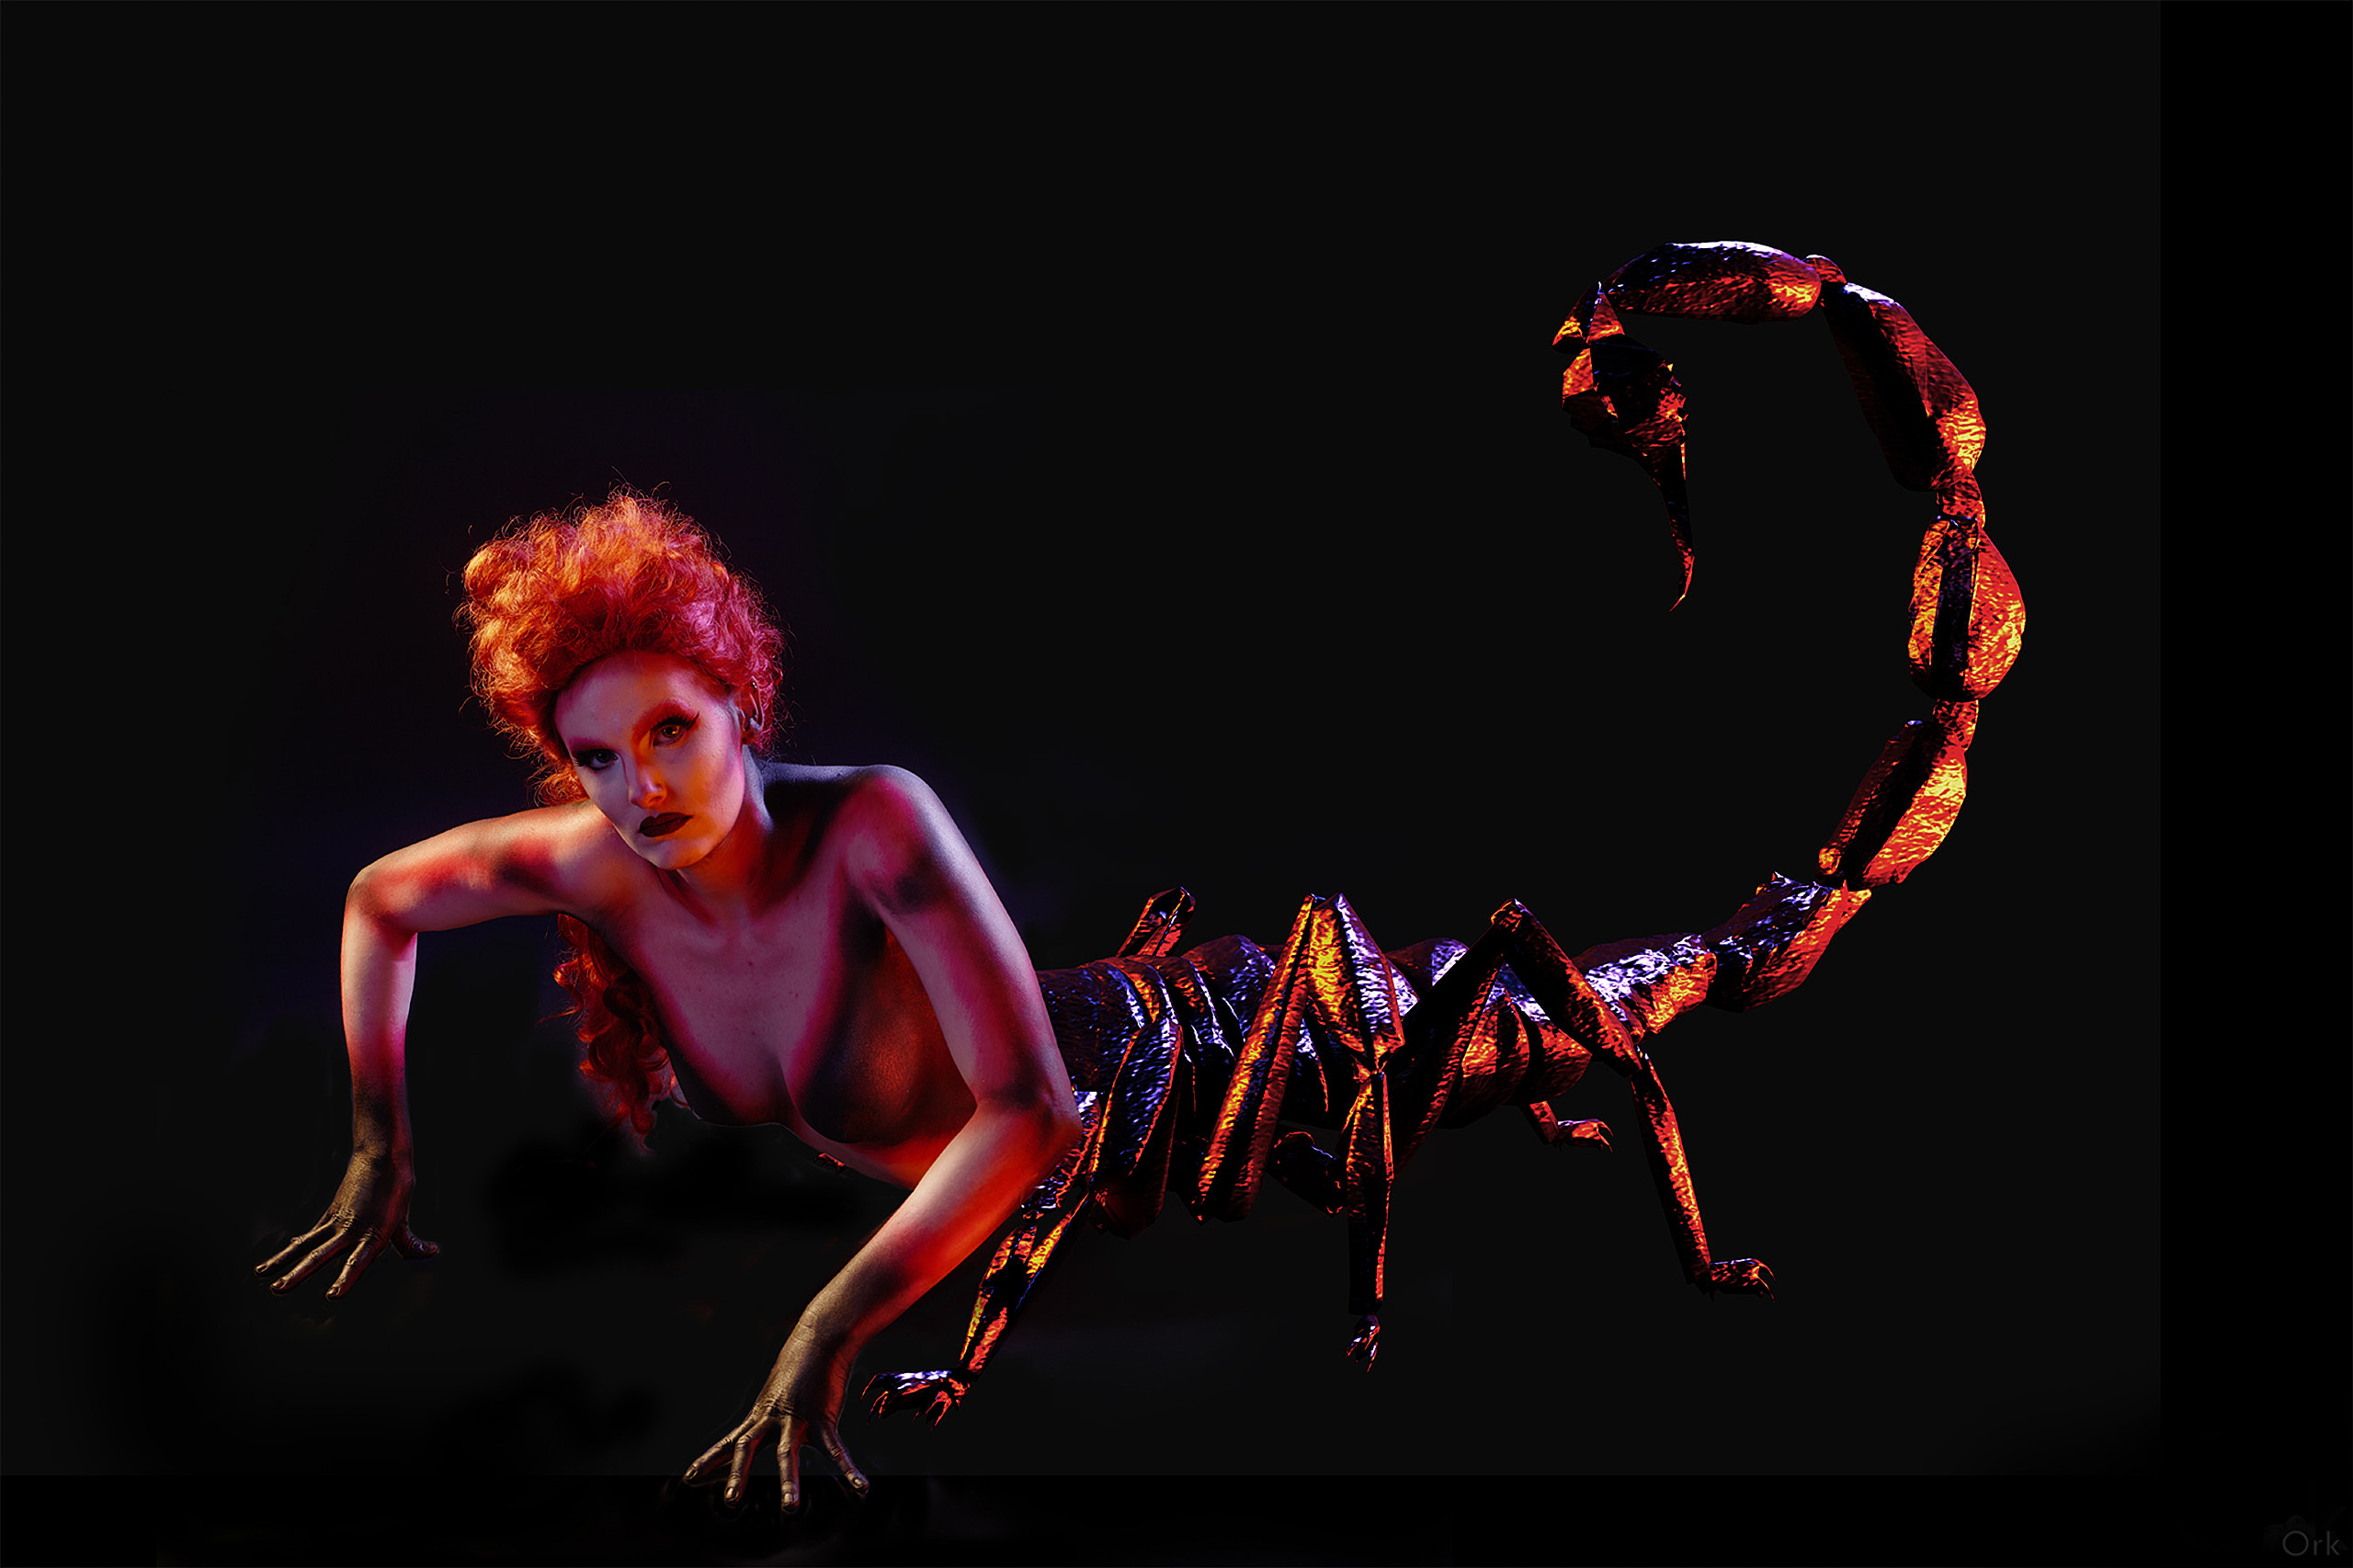
Tadaa! Let's take this result and go mix it with our world!
Step 4: Let's mix it all together!
Back to Photoshop. Ah, good old Photoshop, how I missed you. Familiar buttons, familiar tools. Let's go mix those steps together shall we? How hard can it be.
Quite hard.
I've experimented several times in the past with compositing, and every time I got a little bit better, and the end results starts to look like it might have been real. However, in those composites the basis of each individual layer was an image that by itself is completely real. And now I'm adding stuff that just.. isn't. And it's the little details that count. Ragged edges, curved corners. Dust. Mould. It's all not there in the scene.
Turns out that that makes mixing quite interesting. I tried what I could by adding a sky, more fire, real flames, and some dust. Let's look at the final result:
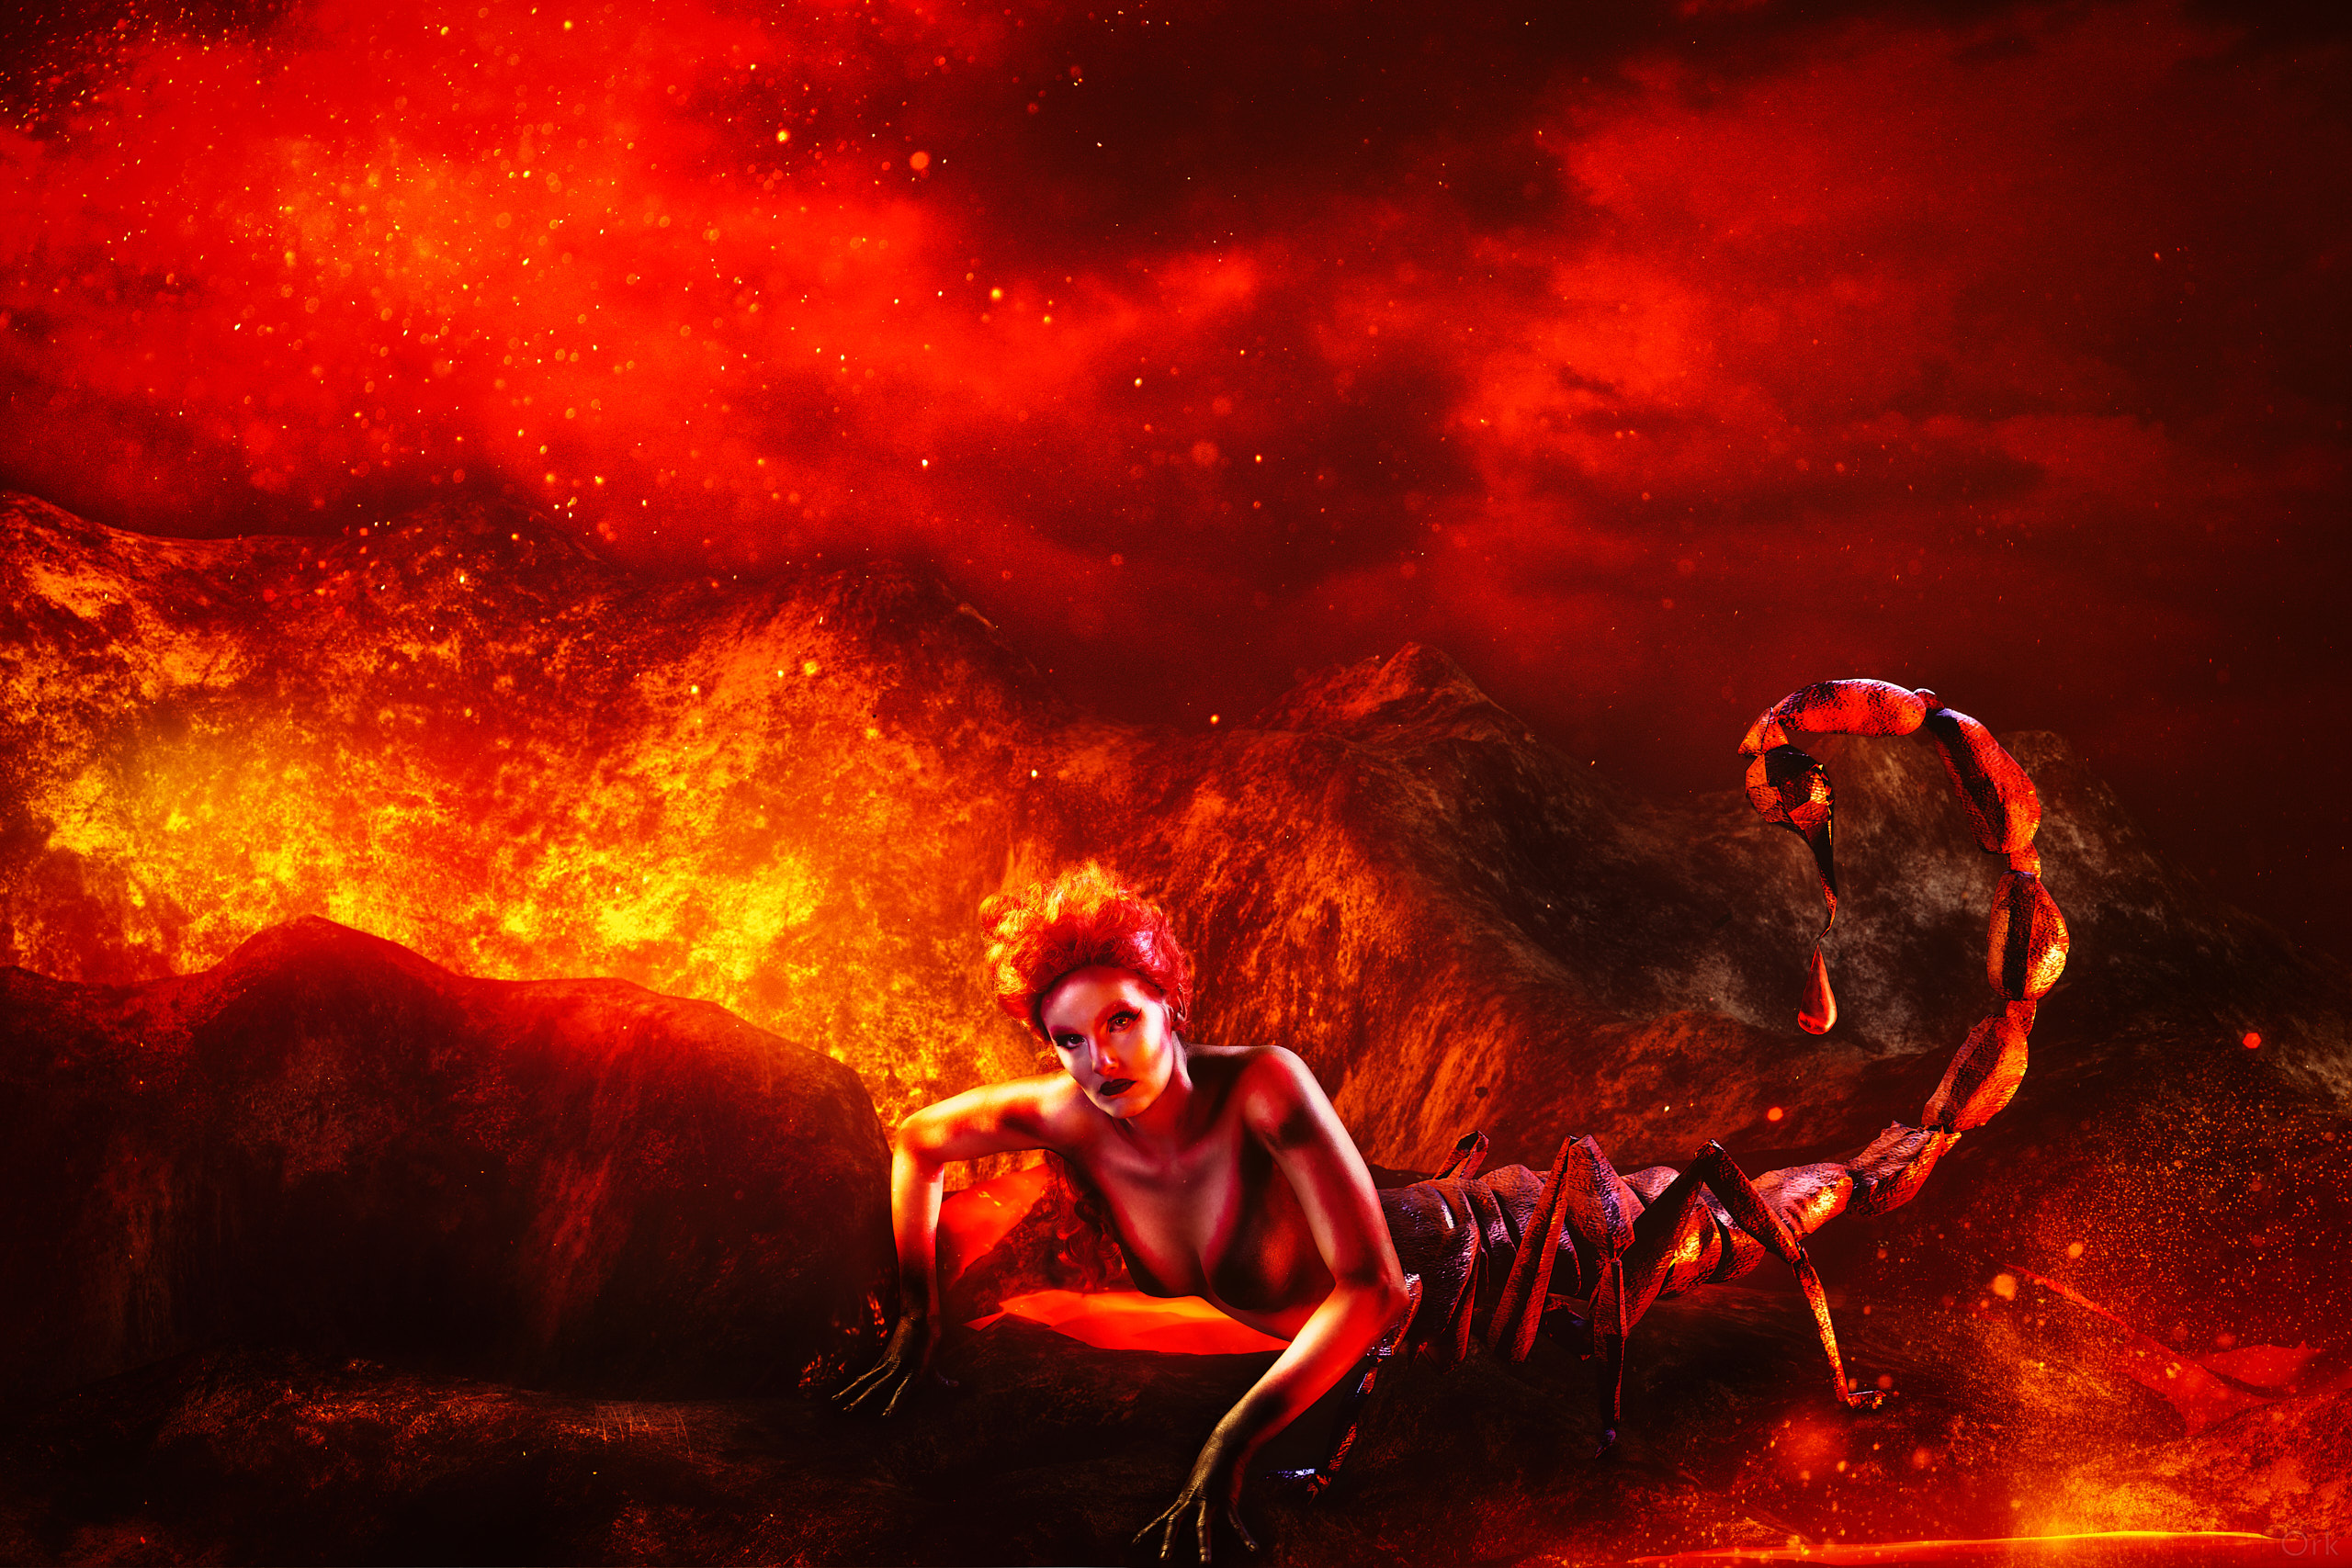
So, what do I think?
It's hopeless! Worthless. I see so many mistakes now. Little errors everywhere.. The carefully constructed light doesn't match at all. There's way too much shine on the model. Her hands seem to touch the void instead of the ground... all these are bit by bit correctable in photoshop, but alltogether: no I should go back to step 1 and build myself a new world.
So I will. On a different project. With bigger ambitions! But I'm sharing this anyway, because I loved every step of this path! This is learning after all. Don't be ashamed to show your steps to the world. Go build!